First steps
Add targets, watch the first scan, set up notifications and an exposure policy.
1. Add targets
Add targets is a two-step wizard:
- Choose the satellites that watch the targets (at least one).
- Enter the targets, one per line or comma separated: IPv4, IPv6, hostnames, CIDR networks, ranges like
192.0.2.10-20. Polaris detects the type while you type.
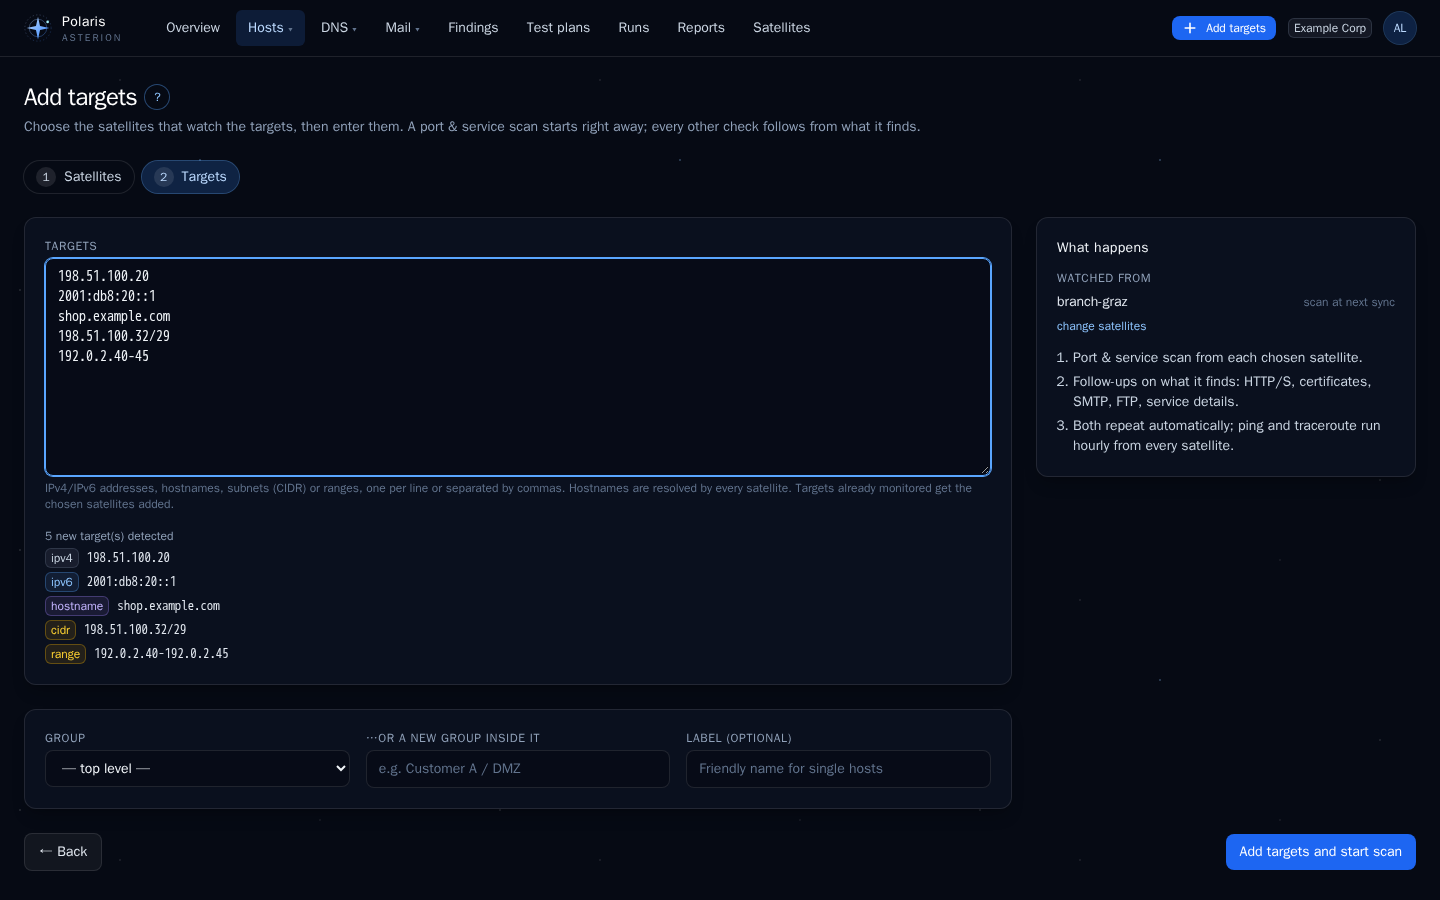
New hostnames must resolve and new domains must be delegated by their registry (switch off with POLARIS_VERIFY_HOSTNAMES / POLARIS_VERIFY_DOMAINS for portals without outbound DNS). Global satellites never watch private addresses.
A port scan starts at once on websocket-connected satellites; the follow-up checks (HTTP, HTTPS, certificates, SMTP, FTP, service details) run on what it finds. Both then repeat at the tenant’s intervals (default daily, Features).
2. Watch the run
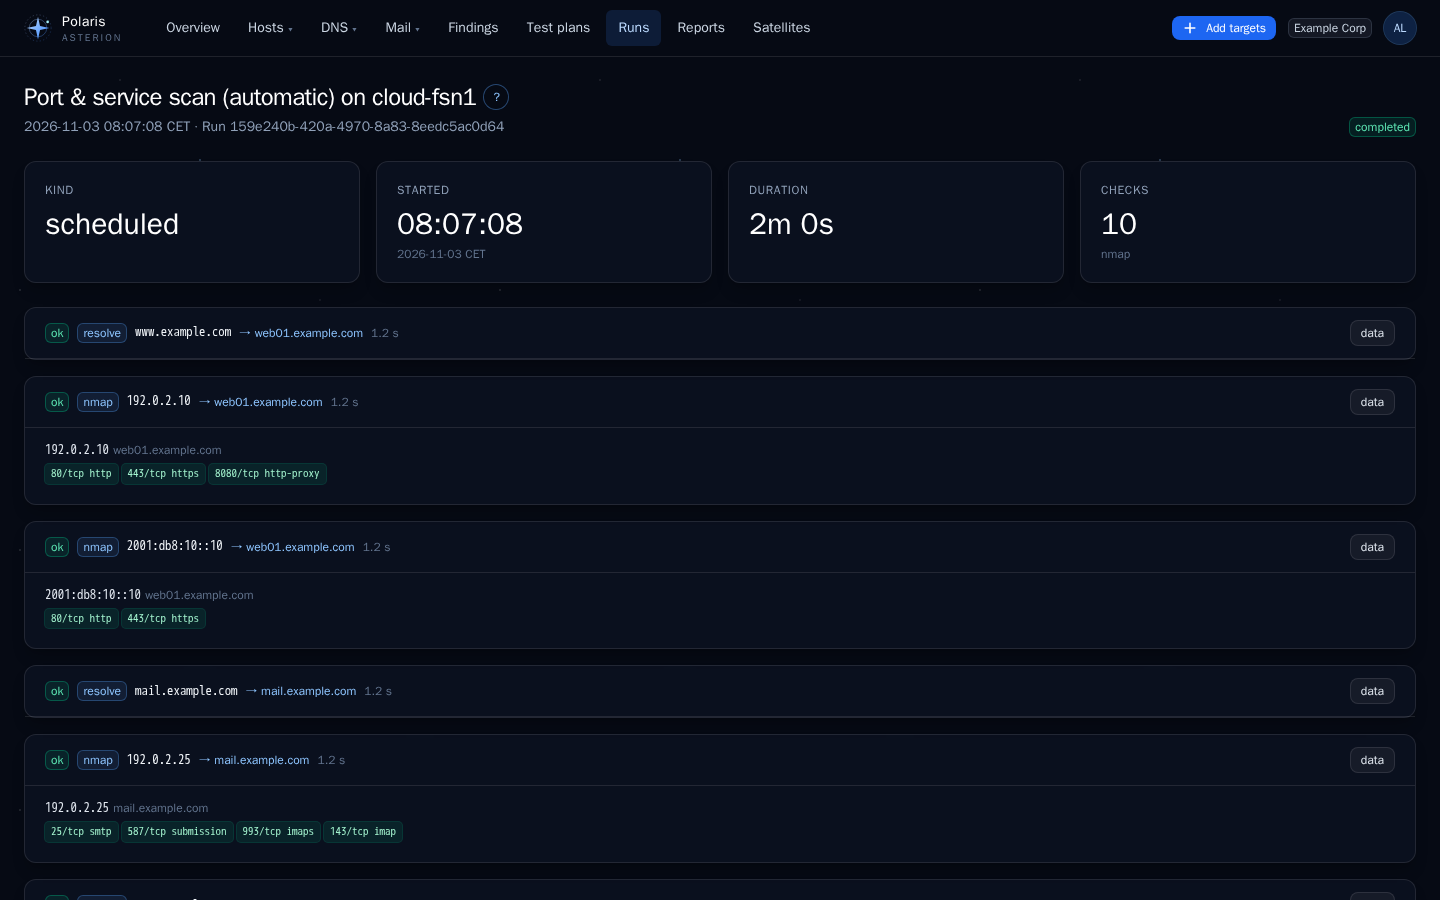
Runs shows every run live: which targets are done, which services appeared. Hosts show up while the run is going.
3. Look at a host
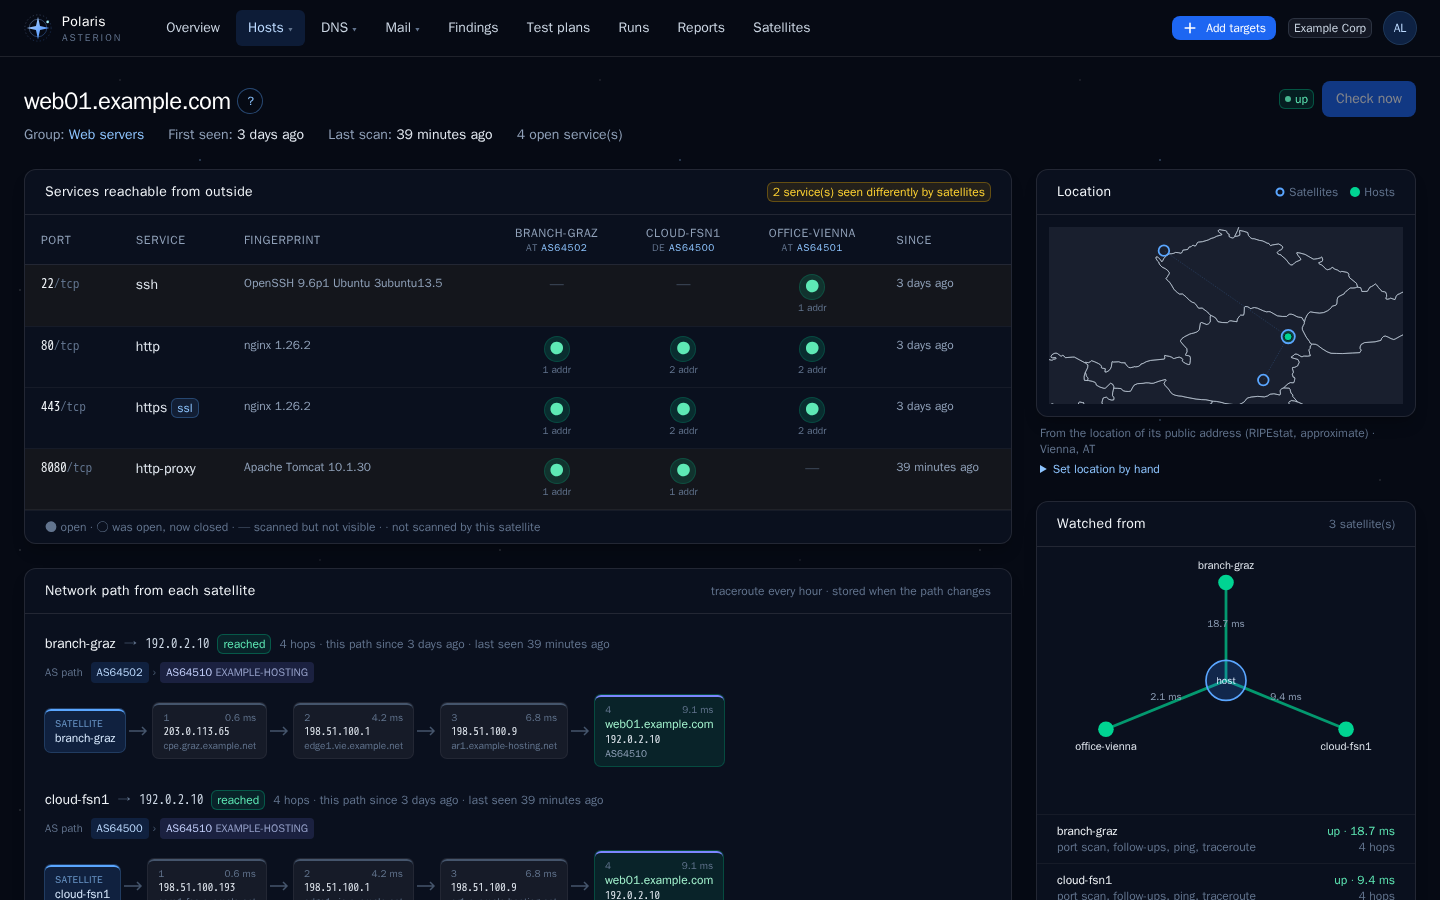
The host page brings everything together: addresses and names, the service matrix (rows = ports, columns = satellites), certificates, software versions, history, network paths from every satellite and the findings.
4. Domains
Monitor a domain with DNS → Add domain. Choose DNS monitoring and/or mail monitoring; the first check runs at once and the domain page offers to create a schedule with exactly those parameters.
5. Notifications
Notifications (tenant admins): add an SMTP or ntfy channel and choose the events. The first scan is a baseline and never alerts. All events: Notifications and reports.
6. Exposure policy
Exposure policy: copy a template (e.g. Baseline external) after a preview, then adapt it. Rules say which services are allowed or forbidden in which zone. A violation needs two scans in a row. See Findings and exposure policy.